

Stone Glue-Up Wall Panel Installation
Tools and Supplies Needed:
- Protective eyewear or safety goggles
- Masking tape
- Straightedge or Speed Square®
- Pencil
- Table saw, jig saw or circular saw (for long, straight cuts)
- Tin snips (for notching or short cuts)
- Level (2′ to 4′)
- File or sandpaper
- Spray bottle with liquid soap and water mixture
- Caulk gun and adhesive
Recommended Adhesive
- Loctite® Power Grab Ultimate®
Preparation
Before starting, make sure all surfaces are clean, dry, flat, smooth and free from dust, grease, etc. Lightly sand any glossy surfaces to remove sheen.
Measure the first area to be covered by Aspect material. Lay out the entire project on a flat surface, before adhering to the substrate to be sure you have enough tiles and your design and layout is correct. Plan for cutouts, corners or edge treatments before applying tiles. Tile edge seams will be less visible if they are not aligned.
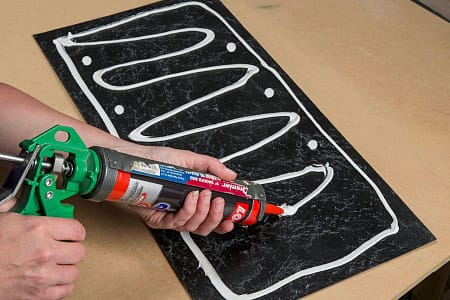
Clean the back side of each panel using isopropyl alcohol and a paper towel or cloth. Apply adhesive to the back of the first panel. The recommended adhesive is Loctite® Ultimate®. Read and follow adhesive manufacturer’s directions. Apply panel adhesive as shown in Figure A, using approximately a 1/8″ to 1/4″ bead. The 10 oz. adhesive tube covers approximately 3 Aspect glue-up stone panels.
Before installing tiles on the wall, lightly spray a soap and water mixture (2 tsp dish soap to 16 oz water) onto the adhesive and spread evenly with a sponge. This will allow the tile to be re-positioned within a few seconds of applying to the wall.
Installation
Place the first tile into position and press against the wall – using hands or a “J” roller – firmly and evenly across the panel and squeeze out excess air. If edges or corners pop up, use a thumbtack in tile seam or painter’s adhesive. Follow adhesive manufacturer’s directions. Do not allow any excess adhesive on tile face to dry as it will be very hard to clean up when dry and could damage the finish. Place the second tile and so on.
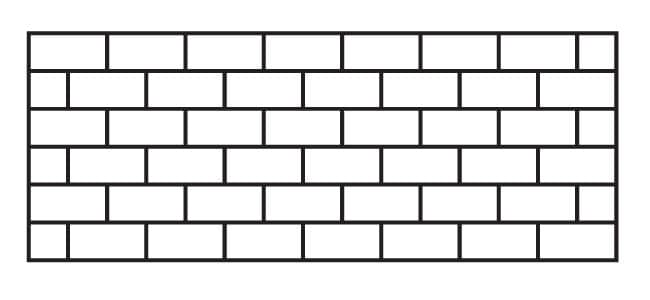
When starting a new row, use either a random staggered pattern or a subway pattern, either horizontally or vertically.

Cutting tiles
If cutting tiles is necessary, use one of our recommended tools listed above. A table saw, jig saw or circular saw is recommended for longer straight cuts. A tin snips can be used for notching or short cuts. If desired, use a metal file or sandpaper to debur the cut edges.
Cleaning
Wash the tiles as needed using a mild liquid dish detergent mixed with warm water.
Care after Installation
As with all natural stone products, there is some inherent risk of staining. Stone sealers or impregnators can provide protection against stains.